Check fault symptoms and the corresponding components in sequence, from supply conditions through actuation and protective circuits.
Applicable equipment: pneumatic industrial manipulators / pneumatic balancing hoists / vacuum lifters / pneumatic tooling / custom handling equipment.
| Item | Details |
|---|---|
| Document No. | AUREK-MNT-PNE-001 |
| Version | V1.0 |
| Scope | Air supply, filter-regulator, tubing fittings, pushbutton valves, directional valves, flow-control valves, cylinders, vacuum generators, suction cups, and pneumatic tooling |
| Applicable Stage | Pre-use inspection / Routine maintenance / Preliminary after-sales troubleshooting / On-site fault reporting |
| Intended Users | On-site operators, equipment maintenance personnel, sales and after-sales service personnel |
| Usage note: This document provides general troubleshooting guidance for pneumatic systems. Corrective actions may vary with load, tooling, control logic, and site air-supply conditions. For issues involving control-valve internals, cylinder seals, loss-of-air protection, or safety circuits, contact the manufacturer or qualified personnel. |
1. Safety requirements before troubleshooting and maintenance
- If the equipment behaves abnormally, stop operation and place the workpiece securely or remove it. Do not continue trial operation under load.
- Before maintenance, replacement of pneumatic components or disconnection of air hoses, shut off the main air supply and release residual circuit pressure.
- Before restoring the air supply, confirm that the tooling is in a safe position. Personnel must remain outside the movement range of the workpiece, tooling and manipulator.
- Pneumatic valves, regulators, balancing pressures and protective circuits have normally been commissioned at the factory. Unqualified personnel must not alter them arbitrarily.
- If the equipment rises or descends by itself, the tooling fails to release, the brakes fail or air-loss protection behaves abnormally, stop using it and contact the manufacturer.
2. Pneumatic troubleshooting sequence
| Inspect from the outside inward, from simple causes to complex causes, and from the air supply to the actuators. Avoid dismantling valves or cylinders before locating the fault. |
|---|
| Troubleshooting steps | Inspection Focus | Diagnostic Method / Recommended Action |
|---|---|---|
| 1. Check the Air Supply | Check that the main air supply is open, pressure meets equipment requirements, and the air compressor is not cycling excessively. | Check the gauge and confirm stable main supply pressure. If pressure is below the equipment requirement, correct the air-supply problem first. |
| 2. Check the Filter-Regulator | Condensate in the filter bowl; blocked filter element; unstable regulator output; pressure misadjusted. | Drain water; observe the output pressure; clean or replace the filter element if necessary. |
| 3. Check Air Tubing and Fittings | Kinked, worn, cut or bulging hoses; loose or leaking push-in fittings. | Listen for leakage and use soapy water to locate leaks. Route hoses correctly and replace damaged hoses and fittings. |
| 4. Check control valves | Check operation of the pushbutton, directional, and flow-control valves; check for blocked valve ports or abnormal leakage at exhaust ports. | Press the button to see if there is air output; check the muffler and valve port; if abnormal, contact maintenance personnel. |
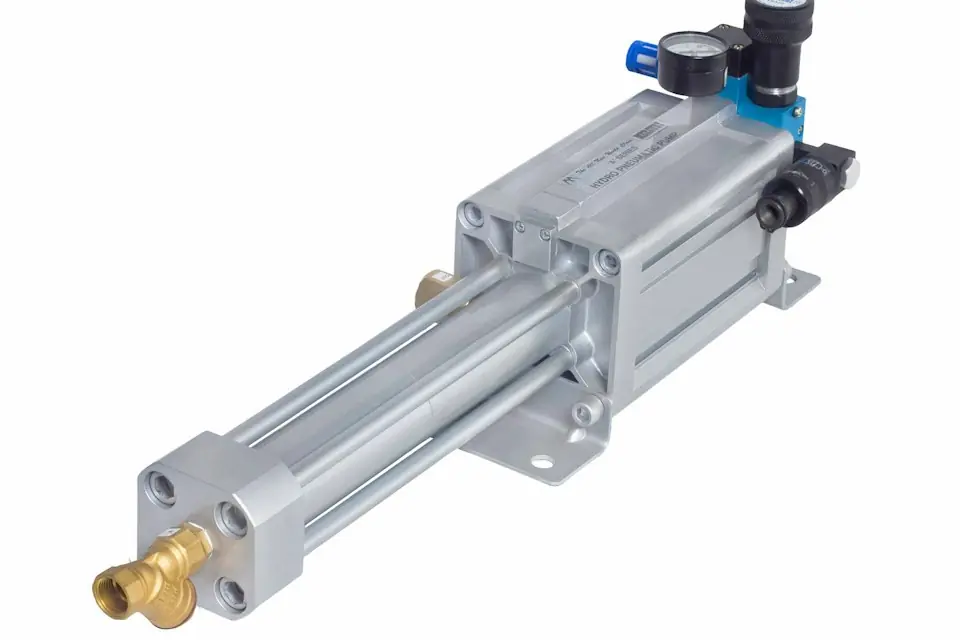
| 5. Check cylinders and actuators | Check the cylinder for stick-slip, low force, internal leakage, or binding, and confirm that each tooling cylinder completes its full stroke. | Test unloaded operation; check the air supply to both cylinder ports; determine whether there is internal leakage or mechanical interference. |
| 6. Check the Tooling and Load | Check whether the workpiece is overweight, the tooling is eccentrically loaded, the suction cups or gripper jaws are worn, or the workpiece surface is abnormal. | Check the workpiece weight and dimensions; check the tooling contact surface; re-evaluate the tooling plan if necessary. |
3. Common air-supply and filter-regulator problems
| Symptom | Possible Causes | Inspection and Corrective Action |
|---|---|---|
| Insufficient force throughout the equipment | Low main supply pressure; insufficient flow in the main line; pressure drop when several devices consume air simultaneously. | Check the main air-supply gauge and the gauge at the equipment. Confirm that pressure is stable. If necessary, increase the supply-line diameter, add an air receiver, or adjust the air-use cycle. |
| Movement Speed Fluctuates | Air-supply pressure fluctuates; compressed air contains water; regulator output is unstable. | Observe the pressure gauge for fluctuation; drain condensate from the filter; check whether the regulator has been misadjusted or is blocked. |
| Excess water in the filter bowl | Insufficient compressor after-treatment; poor refrigerated-dryer performance; condensate not drained promptly. | Drain daily. Add upstream filtration, a refrigerated dryer or automatic drainage if required. |
| Regulator Output Is Unstable | Loose pressure-adjustment knob; faulty internal diaphragm or seal; excessive inlet-pressure fluctuations. | Lock the knob and observe inlet pressure. If output remains unstable after adjustment, replace the regulator or contact the manufacturer. |
| Equipment will not lift | Air supply not open; pressure below the equipment's operating requirement; loaded-state switching not completed. | Open the air supply; confirm pressure at the equipment; check whether loaded/unloaded control switches correctly; confirm that the workpiece does not exceed the rated load. |
4. Air-hose, fitting and circuit leaks
| Symptom | Possible Causes | Inspection and Corrective Action |
|---|---|---|
| Leakage at fittings | Air tubing is not fully inserted; the tubing end is not cut square; the seal in a push-in fitting is worn; the threaded fitting is loose. | Remove the air tubing, cut the end square, and reinsert it fully. Tighten threaded fittings. If leakage persists, replace the fitting. |
| Damaged or Leaking Air Tubing | Air tubing is abraded by the workpiece, sharp edges, or moving parts; long-term aging; tubing has bulged. | Replace the air tubing with the same specification. Improve routing and add a protective sleeve or retaining clips, keeping the tubing clear of moving joints and sharp edges. |
| Slower movement | Air tubing is kinked; the line is excessively long; the line diameter is too small; the silencer is blocked. | Straighten the lines; remove unnecessary tubing length; verify the line diameter; clean or replace the silencer. |
| Repeated hose disconnection | The line diameter does not match the fitting; the air tubing is under tension; the fitting's retaining collet is damaged. | Confirm the air-tubing specification; add retaining points and movement allowance; replace the push-in fitting. |
| Slow Leaks Are Difficult to Locate | A small leak is present at a valve-body connection, tee, push-in fitting, vacuum line, or suction-cup connection. | Apply soapy water at each suspected leak point; isolate pneumatic-circuit sections; observe pressure retention. |
5. Control-valve, pushbutton-valve and flow-control faults
| Symptom | Possible Causes | Inspection and Corrective Action |
|---|---|---|
| No response to button actuation | Control air does not reach the pushbutton valve; a small control tube is disconnected; the pushbutton valve is damaged or sticking. | Check the control-air supply; verify air at the pushbutton-valve outlet; inspect the small control tube and pilot port. |
| Valve Response Is Sluggish or Inconsistent | Moisture, oil or dust inside the valve; a sticking spool; abnormal spring return. | Improve air-supply filtration. With the air supply shut off, clean external connections. If the valve body has an internal fault, replace it or contact the manufacturer. |
| Continuous Leakage from the Exhaust Port | Damaged directional-valve seals; air passing between cylinder chambers due to internal leakage; contaminated seals or incorrect assembly. | First determine whether leakage originates in the valve or cylinder. Check for internal leakage between cylinder chambers. Replace the valve or cylinder seals as necessary. |
| Movement Speed Is Too High | Excessive flow-control opening; changed load; incorrect cushioning adjustment. | Gradually close the flow-control valve; confirm the load range; avoid making a large adjustment in one step. |
| Motion is too slow | Insufficient flow-control opening; blocked silencer; inadequate air supply; blocked valve port. | Increase the flow-control opening as appropriate, clean the silencer, and check supply pressure and piping for restrictions. |
| Abnormal Loaded/Unloaded Switching | Control valve does not shift; pilot signal is insufficient; pressure is incorrectly adjusted. | Check the Load button, unloaded-balance pressure, and loaded-balance pressure. Do not activate the loaded state when no workpiece is gripped. |
6. Cylinder and actuator faults
| Symptom | Possible Causes | Inspection and Corrective Action |
|---|---|---|
| Cylinder Does Not Move | No air supply; the directional valve does not shift; air tubing is connected incorrectly or blocked; the mechanical structure is binding. | Confirm the air supply to both cylinder ports; check directional-valve output; check the tooling or linkage for mechanical interference. |
| Cylinder Force Is Low | Insufficient air supply pressure; excessive load; internal leakage in the cylinder; mismatched cylinder specifications. | Verify pressure and load; check for internal leakage. If low force persists, contact the manufacturer for assessment. |
| Cylinder Exhibits Stick-Slip or Rough Motion | Water or contaminants in the air supply; worn seals; high guide resistance; eccentric loading; incorrect speed adjustment. | Improve filtration; check guides and connections; adjust load center; replace seals if necessary. |
| Leakage at cylinder ends | Piston or end-cap seals are worn; the cylinder bore or rod is scored; prolonged exposure to dust has caused wear. | Locate the leak; replace seals or the cylinder; improve dust protection and air preparation. |
| Tooling Cylinder Does Not Complete Its Stroke | Restricted stroke; changed workpiece dimensions; shifted gripper-jaw position; insufficient air pressure. | Check workpiece dimensions and gripper-jaw positions; verify the travel switch or end stop; unload the workpiece before adjusting the tooling. |
7. Common vacuum-gripping problems
| Symptom | Possible Causes | Inspection and Corrective Action |
|---|---|---|
| Vacuum Tooling Does Not Grip | Insufficient vacuum; deteriorated cups; a rough, oily or perforated workpiece surface; leaking vacuum hoses. | Check the vacuum gauge, clean the workpiece surface, replace the cup, and inspect vacuum hoses, fittings and cup connections. |
| Workpiece Drops After Pickup | Too few suction cups; insufficient effective holding area; workpiece deformation; handling motion is too fast; inadequate vacuum retention. | Reduce handling speed, check the cup layout, increase cup quantity or change the cup type as appropriate, and assess drop-prevention protection. |
| Slow vacuum build-up | Excessive vacuum-line length; insufficient pipe diameter; blocked filter; inadequate supply to the vacuum generator. | Shorten the pipeline; check the air supply pressure; clean the vacuum filter; check the vacuum generator. |
| Vacuum Releases Slowly | Vacuum-break valve fault; restricted exhaust path; suction cups adhere too tightly to the workpiece. | Check the vacuum-break valve, clean the exhaust port, and adjust cup layout and contact pressure. |
| Rapid Suction-Cup Wear | Sharp workpiece edge; rough surface; unsuitable suction-cup material; dragging during operation. | Use cups made from a more suitable material, avoid dragging, and add guiding or locating features to reduce uneven wear. |
8. Tooling, brakes and safety circuits
| Symptom | Possible Causes | Inspection and Corrective Action |
|---|---|---|
| Tooling does not clamp securely | Insufficient gripping pressure; worn gripper pads; changed workpiece dimensions; incorrect tooling position. | Check gripping pressure; replace gripper pads; verify workpiece dimensions; correct the position, then test-grip again. |
| Tooling Will Not Release | Release valve does not operate; cylinder binds; workpiece is mechanically wedged; mechanical interference. | First stabilize the workpiece. Check the Release button and control valve; verify cylinder operation; inspect the tooling for deformation. |
| Joint brake does not actuate | No air in the brake circuit; faulty pushbutton valve; kinked hose; binding brake mechanism. | Check brake-control pressure and pushbutton-valve output, route hoses correctly, and contact the manufacturer if necessary. |
| Equipment Raises or Lowers on Its Own | Incorrect unloaded/loaded balance-pressure adjustment; air-supply pressure fluctuations; internal cylinder leakage; abnormal balance circuit. | Remove the equipment from service immediately; stabilize the workpiece; do not continue loaded testing; have qualified personnel recommission the system. |
| Abnormal Motion After Loss of Air | Loss-of-air protection has failed; the air-reserve circuit is abnormal; the check valve or safety valve has failed. | Remove the equipment from service and contact the manufacturer to inspect the safety circuit. Unqualified personnel must not make adjustments themselves. |
9. Rapid leak detection and diagnostic methods
| Method | Applicable locations | Procedure |
|---|---|---|
| Audible Leak Check | Damaged fittings, valves, silencers, and air tubing with obvious leakage | With the equipment supplied with air, listen for hissing at the suspected location while maintaining a safe distance. |
| Soapy water leak detection | Push-in fittings, threaded fittings, valve-body connections, vacuum lines and cup connections. | After applying the solution, observe whether bubbles continue to form. Wipe the area dry after inspection to avoid contaminating components. |
| Pressure-Hold Test | The complete pneumatic circuit, tooling holding circuit, and vacuum holding circuit | After isolating downstream functions, observe the rate of pressure drop to determine whether a slow leak is present. |
| Isolation-by-Section Test | Multi-branch pneumatic circuits, tooling pneumatic circuits, and vacuum systems | Isolate circuit sections one at a time to narrow the leak location and avoid replacing components without diagnosis. Any disconnection must follow the isolation and residual-pressure release requirements in Section 1. |
| Substitution Test | Suspect pushbutton valves, directional valves, pressure regulators and flow-control valves. | Perform substitution tests only after verifying matching specifications and safe conditions. Qualified personnel must handle critical safety components. |
10. Routine maintenance recommendations
| Maintenance item | Recommended Interval | Maintenance details |
|---|---|---|
| Air-Supply Pressure Check | Daily | Check the main air supply and equipment end pressure gauges to confirm that the pressure is stable and meets equipment requirements. |
| Filter drainage | Daily or according to on-site conditions | Drain the accumulated water from the filter cup to prevent moisture from entering the valve, cylinder and vacuum generator. |
| Air-Tubing Inspection | Weekly | Check for wear, bending, bulging, aging, and friction with moving parts. |
| Fitting inspection | Weekly | Check for looseness, leakage, or disconnection; reseat or replace the component as necessary. |
| Control valve inspection | Monthly | Check for responsive operation, abnormal exhaust-port leakage, and proper pushbutton return. |
| Cylinder inspection | Monthly | Check for smooth motion, stick-slip, leakage, binding, or abnormal noise. |
| Vacuum system inspection | Weekly | Inspect cups, vacuum hoses, filters, vacuum gauges and vacuum-break valves. |
| Tooling connection inspection | Weekly | Check that bolts, pins, gripper pads, anti-drop features, and locating components are secure and reliable. |
11. Site checks and specialist work
Items that may be checked on site
- Check whether the air supply is open and pressure is noticeably low.
- Check the filter-regulator for accumulated condensate and confirm that pressure has not been misadjusted.
- Check whether air tubing is kinked, fittings are disconnected, or suction cups show obvious aging.
- Check whether workpiece weight, dimensions, and surface condition match the original design conditions.
- Check whether new obstructions, tooling, utilities, or structures interfere with manipulator motion.
Conditions requiring the manufacturer or a specialist
- The equipment rises or falls on its own and cannot stabilize its balance.
- The control valve continues to leak, the cylinder is suspected of internal leakage, or the safety circuit is abnormal.
- The tooling will not release, a brake fails, or loss-of-air protection behaves abnormally.
- The equipment has sustained a collision, the structure is deformed, or a weld or load-bearing connection is abnormal.
- Balance pressure, loaded-balance pressure, load-switching logic, or tooling safety interlocks require readjustment.
12. Fault symptoms and corrective-action records
| Record item | Details | Remarks |
|---|---|---|
| Equipment number/project name | ||
| Date/Time of Fault | ||
| Fault location | □ Air supply □ Piping □ Control valve □ Cylinder □ Vacuum system □ Tooling □ Other | |
| Symptom Description | ||
| Was the unit carrying a load? | □ Yes □ No; workpiece weight: ________ kg | |
| Air pressure at the equipment | ________ MPa | |
| Is leakage audible? | □ Yes □ No; Location: | |
| Actions Already Attempted | ||
| On-site photos/videos | □ Provided □ Not provided | Provide an overview of the equipment and images or video of the fault location, pressure gauge, piping and tooling motion. |
| Corrective Action / Preliminary Assessment | ||
| Is on-site service required? | □ Yes □ No □ To be confirmed | |
| Spare parts requirements | □ None □ Air hose □ Fitting □ Valve □ Cylinder □ Suction cup □ Other: | |
| Manufacturer Response / Recommended Corrective Action | ||
| Maintenance Person/Date | ||
| Customer confirmation | ||
| Contact/Phone |
| Guide overview: This guide covers routine maintenance and troubleshooting of pneumatic systems for pneumatic industrial manipulators, pneumatic balancers, vacuum lifters and custom pneumatic tooling. It addresses insufficient supply pressure, leaking air lines, loose fittings, control-valve leakage, abnormal cylinder motion, insufficient vacuum grip and tooling that will not release. |
|---|